💡 Note: This process applies to most India Brand digital weighing machines with a similar weight capacity.
✅ Step-by-Step Programming Guide:
Step 1: Enter Programming Mode
- Fully Charge the Machine:
- Make sure your weighing machine is properly charged before starting programming.
- Turn On the Machine on programming mode:
- Press the power button(Switch) and M+, or Shift, or (Up arrow) Button at same time be wait for the display to show Enter.

💡 Note: Tare/Zero Button : Enter for Next Function.
💡 Note: Up arrow or MR Button : Increase the digits.
💡 Note: Side arrow or M+Button : Its for digits transfer.
Step 2: Press “TARE/ZERO” to Go to First Setting
- Display Shows: “
nF“
- Meaning: Net weight mode. Items used to hold the object.
- Use “UP” or “MR” buttons to change between:
nF 0→ Basic modenF 2→ Net weight mode
- Use “UP” or “MR” buttons to change between:
Step 3: Press “TARE/ZERO”
- Display Shows: “
dlSS "
- Meaning: Display mode
dISS 1→ Shows0(1 decimal)dISS 2→ Shows00(2 decimals)- Best part is to use
dISS 1.
Step 4: Press “TARE/ZERO”
- Display Shows: “
SPd "
- Meaning: Speed of response
SPd 0→ Default (for new machines)- Increase value if the machine is old or slow.
Step 5: Press “TARE/ZERO”
- Display Shows: “
ALC“
- Meaning: Air Lock Control
- Use this to stabilize reading if the machine fluctuates due to fans or wind.
Step 6: Press “TARE/ZERO”
- Display Shows: “
A-0“
- Meaning: Auto Zero
- Enables the machine to return to 0 after unloading from platform or loadsell.
Step 7: Press “TARE/ZERO”
- Display Shows: “
dU-0 "
- Meaning: Dummy Zero (affects capacity)
dU-0 0→ Normal range (e.g. it means 30kg)dU-0 1→ Increases capacity range (e.g. it means 300kg)
Step 8: Press “TARE/ZERO”
- Display Shows: “
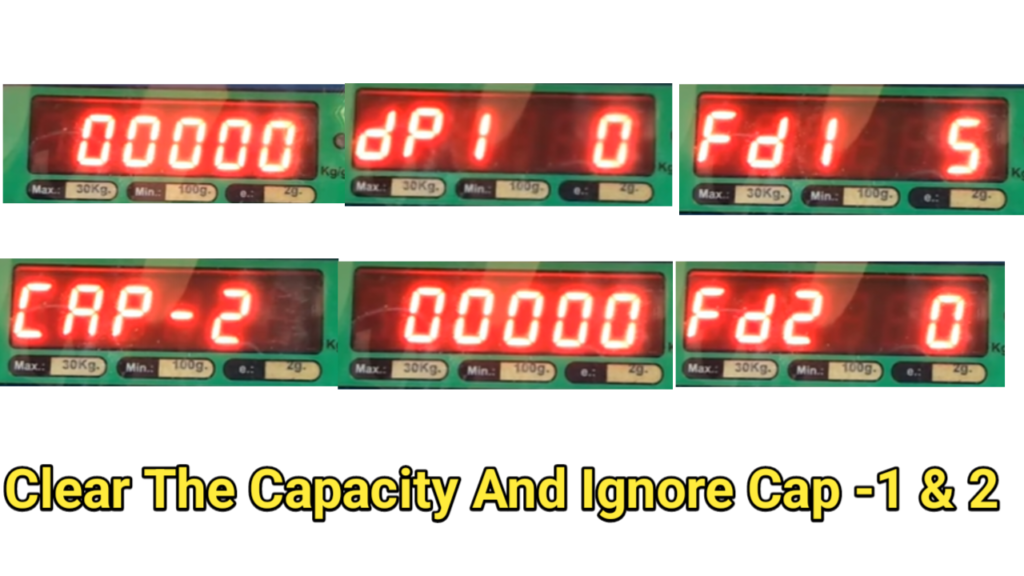
CAP - 1"
- Meaning: Capacity settings
- You will see:
CAP - 1,CAP - 2, thenCAP - 3 - Ignore the function of CAP – 1 & CAP – 2 But you have to clear its Digits Like “0000”.
- You will see:
- Only set values in
CAP - 3
- Once on
CAP - 3, press TARE/ZERO, then:
- Use “UP” & “SIDE” arrow button to adjust the number (e.g. when
30000for 30kg withdU-0 0, or15000for 150kg withdU-0 1)
Step 9: Press “TARE/ZERO”
- Display Shows: “
dP3 "
- Meaning: Decimal Point Display of 3.
- Set to
dP3 4→ Shows up to 3 decimal places (e.g.,2.460)
- Set to
Step 10: Press “TARE/ZERO”
- Display Shows: “
Fd3 "
- Meaning: Frequency or Accuracy of CAP-3.
- This is Least Count (minimum measurable weight)
- Examples:
Fd3 1→ 1g resolution (for 10kg capacity)Fd3 2→ 2g resolution (for 30kg)- If
dU-0 1is set, thenFd3 2becomes 20g resolution
Final Step: Press “TARE/ZERO”

- If settings are completed correctly, machine will reset and show the main display.
After that you should calibrate the machine. This other steps are available on my weight machine categorizes on my website pages, Go and learn.
🎥 Need Help?
If you face any issues or want to see the process visually, click the button below for helpful video tutorials.